Using generics in Go to create a map function (updated)

The generics draft for Go 1.18 changed and my previous post about generics in Go became outdated. Here’s the updated version of it, which you can run in playground.

Given a function that applies a transformation to a single input, a Map function is a known programming pattern to apply that function to an entire array, applying that transformation to all its elements.

In this example, I implemented a generic (of course) Map function to apply a transformation function to a slice of strings. In this case, the input and output have the same type (string). You can run this code in Go playground.

package main

import (
    "fmt"
    "strings"
)

func Map[A, B any](s []A, fn func(a A) B) []B {
    ret := make([]B, len(s))

    for i, input := range s {
        ret[i] = fn(input)
    }

    return ret
}

func main() {
    var (
        slice        = []string{"This\n", "is\n", "some\n", "string"}
        changedSlice = Map(slice, strings.ToUpper)
    )

    fmt.Printf("%v\n", changedSlice)
}

We can use this same Map function to apply a function that transforms that input to a different type. For example, strconv.Itoa can be used here to convert a slice of integers to a slice of strings [playground]:

func main() {
    var (
        integers = []int{1, 12, 42}
        strings  = Map(integers, strconv.Itoa)
    )

    fmt.Printf("%v\n", strings)
}

Links

Playing with Generics in Go

WARNING: this post is now outdated and its code won’t work! I wrote an updated version of it.

2020 has been full of surprises. It’s been some years since the first implementation of generics in Go, and I can’t believe I wrote this title and it’s not an April Fools prank.

Yesterday an article named The Next Step for Generics was published on the Go Blog with the current draft for generics in Go. They also released a version of The Go Playground which runs this current draft.

The first thing I tried to write was an implementation of Map that would receive a slice of strings and apply strings.ToUpper to every element of it [play]:

package main

import (
	"fmt"
	"strings"
)

func Map(type T)(s []T, fn func(t T) T) []T {
	ret := make([]T, len(s))

	for i, input := range s {
		ret[i] = fn(input)
	}

	return ret
}

func main() {
	var (
		slice        = []string{"This\n", "is\n", "some\n", "string"}
		changedSlice = Map(slice, strings.ToUpper)
	)

	fmt.Printf("%v\n", changedSlice)
}

The output is:

[THIS
IS
SOME
STRING]

What about mapping a slice of ints? Same thing, but after all these years copying functions and changing their types, I wanted to believe I could use the same Map function to apply another function using different parameters [play].

package main

import (
	"fmt"
)

func Map(type T)(s []T, fn func(t T) T) []T {
	ret := make([]T, len(s))

	for i, input := range s {
		ret[i] = fn(input)
	}

	return ret
}

func main() {
	var (
		numSlice        = []int{1, 2, 3, 4, 5, 6}
		changedNumSlice = Map(numSlice, func(i int) int { return i * 2 })
	)

	fmt.Printf("%v\n", changedNumSlice)
}

And the output is:

[2 4 6 8 10 12]

What if I want to create a Map function that converts a type T1 to a type T2? In this example, we’ll convert an int to an int64, nothing really fancy. I also added a ForEach implementation to print the slice [play].

package main

import (
	"fmt"
)

func Map(type T1, T2)(s []T1, fn func(t T1) T2) []T2 {
	ret := make([]T2, len(s))

	for i, input := range s {
		ret[i] = fn(input)
	}

	return ret
}

func ForEach(type T)(s []T, fn func(t T)) {
	for _, input := range s {
		fn(input)
	}

}

func main() {
	var (
		toInt64 = func(i int) int64 { return int64(i) }
		print = func(i int64) { fmt.Printf("%d is an int64\n", i) }

		numSlice        = []int{1, 2, 3, 4, 5, 6}
		changedNumSlice = Map(numSlice, toInt64)
	)

	ForEach(changedNumSlice, print)
}

Again, the output:

1 is an int64
2 is an int64
3 is an int64
4 is an int64
5 is an int64
6 is an int64

Well, a long time ago I used to have dozens of implementations of Contains to check if a slice contained some element. So here I tried to re-implement them:

package main

import (
	"fmt"
)

// Spoiler: WRONG CODE!
func Contains(type T)(haystack []T, needle T) bool {
	for _, current := range haystack {
		if current == needle {
			return true
		}
	}

	return false
}

func main() {
	numbers := []int{1, 2, 4, 8, 16, 32}

	fmt.Printf("Has 1? %t\n", Contains(numbers, 1))
	fmt.Printf("Has 5? %t\n", Contains(numbers, 5))
}

And… I failed miserably:

type checking failed for main prog.go2:9:6: cannot compare current == needle (operator == not defined for T)

I checked the updated design draft, and it can be easily solved using type contraints. After adding the constraint comparable to the type contract II used, it works as expected [play]:

package main

import (
	"fmt"
)

func Contains(type T comparable)(haystack []T, needle T) bool {
	for _, current := range haystack {
		if current == needle {
			return true
		}
	}

	return false
}

func main() {
	numbers := []int{1, 2, 4, 8, 16, 32}

	fmt.Printf("Has 1? %t\n", Contains(numbers, 1))
	fmt.Printf("Has 5? %t\n", Contains(numbers, 5))
}

And finally the output:

Has 1? true
Has 5? false

According to the Go blog,

if everybody is completely happy with the design draft and it does not require any further adjustments, the earliest that generics could be added to Go would be the Go 1.17 release, scheduled for August 2021. In reality, of course, there may be unforeseen problems, so this is an optimistic timeline; we can’t make any definite prediction.

I’ve been waiting for years, August 2021 is fine. I only hope the covid-19 vaccine arrives before. 🙂

More examples?

Adding more examples as I find them:

  1. Matt Layher wrote an implementation of a hashtable using generics. (June 17)
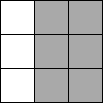
Image processing with Go

A few days ago I wanted to do some batch image processing. It could be done in Photoshop, I know, but I wanted to have some fun as well and learn some algorithms. I started studying Go in January and it sounded like an opportunity to practice a little, so I began to write my own program to process images: blzimg.

blzimg will have some image operations. The first of them (and the only one until now) is called “lightest”. It merges the lightest pixels of a list of images into a single image.

Comparing the luminance of pixels

The first image operation I wanted to do was to get some images and, for every pixel (x,y) of them, their RGB values would be compared. The lightest pixels at the same position (x,y) compose the final image.

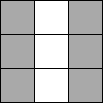
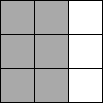
Images talk better than text. Let’s use these 3 images:

3x3 boxes with the first column white 3x3 boxes with the second column white 3x3 boxes with the third column white
img1.jpg img2.jpg img3.jpg

The lightest operation will merge these three images into a final image that will be this:

 
full

The grey pixels where fully replaced by the white pixels, since the latter are lighter. The formula to obtain the lightest pixel of an image was borrowed from this question at StackOverflow. The L is for luminance, and r, g, b are the color components of a pixel:

L = 0.2126 * r + 0.7152 * g + 0.0722 * b

The more the luminance, the lighter a pixel is. Our main idea is that if the luminance value L for a pixel is greater than the L value for another pixel, that pixel will be the lightest one and, therefore, be chosen.

I don’t know if it’s the scientifically proved best choice, but it has worked for my purposes. This is my implementation in Go:

Comparing images

At first, I created a function to receive a slice of image.Image‘s and travel through their pixels, comparing them:

In this old version, notice that the first image was read twice in the for loop and an empty slice would ruin everything. 😀 But our idea is this: store the lightest pixel and compare it to the pixel in the current image. If the newer pixel is lightest, we replace the current lightest pixel.

I created this function using TDD and it worked well with image.Image‘s, but how can we parse images from File‘s and keep the code testable?

Using containers for testing

The first version of Result() function received a slice of image.Image‘s, based on my test where I created some image.Image‘s to verify. But it has some limitations in the real world. How could I handle real files?

  • If I used a slice of image.Image‘s as arguments, I would have to get a list of files, decode them and create a very heavy slice of image.Image‘s to pass to Result().
  • If I used a slice of File‘s as parameter, it would become harder to do unit testing.

I created an interface to solve both cases: ImageContainer.

Its implementations must have a GetImage() function that will return a image.Image only when needed, so it’s a more lightweight approach. For example, a FileImageContainer would keep the file path within it and return the image.Image when GetImage() is called. An ImageItselfContainer, used in the unit tests, can keep the image data itself and returns this data when GetImage() is called. This is the current implementation:

The final version of Result(), now using an ImageContainer‘s instead of image.Image‘s, is shown below. The image operation won’t know (and it doesn’t need to know!) what kind of container it’s dealing with, and now the same code can handle image.Image‘s and File‘s!

Parsing command line arguments with cli.go

To parse command line arguments I used cli.go. It’s a library that parses command line parameters and creates a nice help output:

$ blzimg 
NAME:
   blzimg - Execute some operations on images

USAGE:
   blzimg [global options] command [command options] [arguments...]

VERSION:
   0.1

AUTHOR(S): 
   Esdras Beleza  
   
COMMANDS:
   lightest, l  Merge the lightest pixels of some images in a single one
   help, h      Shows a list of commands or help for one command
   
GLOBAL OPTIONS:
   --output "final.jpg" Output file
   --help, -h           show help
   --version, -v        print the version

Finally: running blzimg

A few days ago I took some crappy pictures just to test my new Rokinon 12mm lens with my Fuji X-E1 camera. I used a intervalometer to take these pictures with a interval of 20 seconds between them, in a total of 8 minutes that were compressed in this timelapse of a few seconds:

What if we run blzimg to merge all the images from this timelapse into a single image using the lightest operation?

blzimg --output final.jpg lightest 2015-04-07_21-*

Since the lightest points in these pictures are the clouds and the stars, the output is a giant cloud and the amazing beginning of a star trail as if it were below the clouds:

final

Show me the code!

The full code can be downloaded at my GitHub. 😀